Step by step guide:
before the install:
- make sure that your Apple Tv is Jailbroken. if it's not i've made a tutorial on how to do that right here.
- make sure you have a micro usb cable.
- Download Nito installer for mac or windows:
Downloads:
Mac: download
Windows: download
Step 1:
Plugin your Apple Tv to Tv using your HDMI cable. wait for it to stop flashing and then unplug the HDMI and then plug it into your computer using a micro usb cable
(note: itunes might open up and if it does just close it using cmd+q)
Step 2:
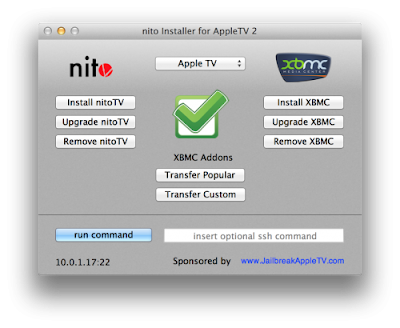
Open up Nito Installer.
Step 3:
choose your Apple tv model.
Step 4:
Press the "Install nitoTV" button and it will begin installing. You will be asked to input a password. just type frontrow if you haven't changed the default password.
Step 5:
After a few moments checkmark will appear in the center of the window. that means that it have been installed correctly.
Step 6:
now click the "Install XBMC" button and wait a few moments for that to install too.
Step 7:
Now you should be able to unplug the micro usb cable and plug it into your TV and both nitoTV and XBMC should show up.
Step 8:
Enjoy and have fun with your newly installed applications!
And as always remember to follow Your Tech Feed for more posts like this one!
If you have any questions you can ask them down below and i will answer as quick as i can!


NICE !!
SvarSlet
SvarSletIch habe immer http://www.macebook-test.de für mein Mac verwendet , sie sind groß .